Every audio repair tool on a technician’s bench tells a story. Maybe it saved a show when an amplifier died minutes before a concert, or maybe it brought a vintage microphone back to life after decades in storage. The truth is, without the must-have tools for audio technicians, even the most talented engineers can be left powerless.
I’ve learned this lesson the hard way. A few years ago, I tried fixing a buzzing speaker with nothing more than a screwdriver and blind confidence. Not only did I fail, but I also managed to make it worse—turns out I damaged the already fragile speaker coil. Since then, I’ve come to appreciate the importance of proper professional technician equipment: a soldering station, oscilloscope, and multimeter, alongside specialized gear like a frequency analyzer, signal generator, and anti-static mat.
In this article, we’ll explore why certain audio repair tools are considered non-negotiable by experts, how they’re used in real-world repairs, and which extras make life easier but often get overlooked. If you’re just starting, think of this as a roadmap. If you’re a seasoned tech, consider it a reminder that even trusted hands need reliable gear.
And if you want to understand the bigger picture of system care, don’t miss complementary reads like keeping sound failures at bay or a deep dive into why gear malfunctions happen in the first place.
Why Tools Matter More Than Talent Alone
“An expert without tools is just a dreamer with knowledge,” said Henry Collins, a veteran repair specialist in Raleigh. His point? Skill only gets you so far. Having a reliable soldering station or an accurate multimeter can mean the difference between fixing a noisy mixer channel and declaring it unrepairable.
I once misdiagnosed a failing preamp simply because I didn’t have a frequency analyzer on hand. After guessing wrong three times, I borrowed one from a colleague. Within ten minutes, the issue was pinpointed—dust buildup had damaged the gain pot. That experience made me swear never to skip proper diagnostic tools again.
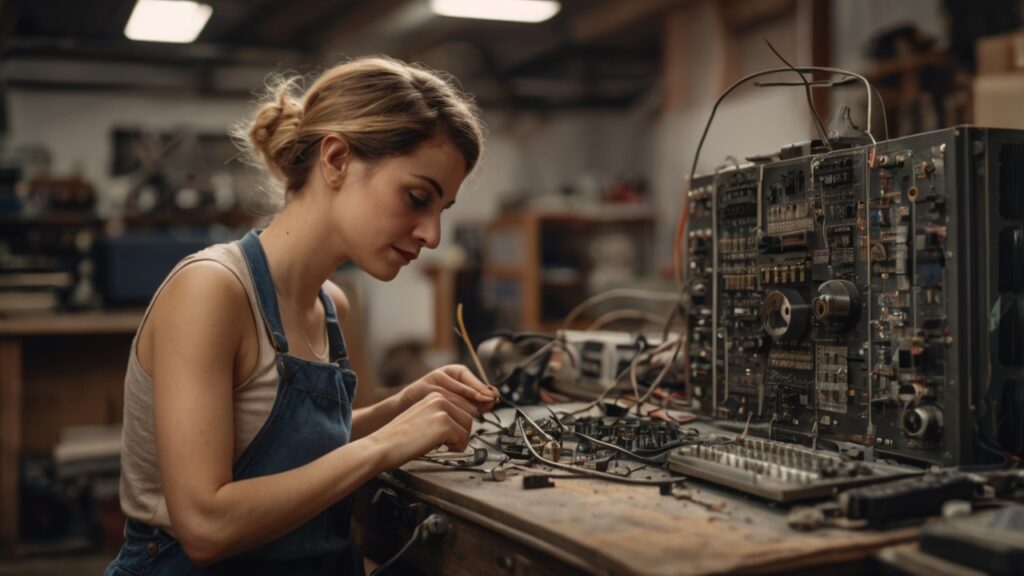
The Core Essentials Every Audio Technician Needs
Soldering Station
A cheap soldering iron will get you through a cable fix, but a professional soldering station is another level. Adjustable temperature, quick heat recovery, and anti-static tips protect delicate circuits. It’s indispensable for repairing broken connectors, reattaching loose resistors, or replacing worn-out faders.
Multimeter
This is arguably the backbone of audio repair. A multimeter checks voltage, continuity, and resistance—helping you trace blown fuses, failed transistors, or overheated chips. I carry one in my bag like a doctor carries a stethoscope.
Oscilloscope
For diagnosing signal path issues, nothing beats an oscilloscope. You can literally “see” sound waves, making it easier to catch distortion, clipping, or grounding problems. Yes, it’s pricey, but reliable diagnostics often justify the cost.
Specialized Tools That Separate Professionals From Amateurs
Beyond the basics, trusted technicians also rely on tools like:
- Frequency Analyzer – Pinpoints irregular frequency spikes, great for detecting damaged coils or poor acoustics.
- Signal Generator – Sends controlled tones through the system to trace failures. A lifesaver for finding where a signal chain breaks.
- Anti-Static Mat and Wrist Strap – Protects sensitive components from electrostatic discharge during electronic repair.
- Precision Screwdrivers – Perfect for opening mixers, microphones, or rack units without damaging fragile screws.
- Diagnostic Test Tones – Used to check speaker response and catch distortion before a live gig.
Once, I skipped using an anti-static mat while opening a digital processor. Guess what? One tiny spark from my hand fried a chip. That $5 shortcut cost me a $400 replacement. Lesson learned: don’t underestimate static electricity.
How These Tools Fit Into Repair Processes
Let’s take a common example: a digital processor freezing mid-show.
- Start with a multimeter to confirm power delivery is steady.
- Use a signal generator to run tones and see where they drop.
- Fire up the oscilloscope to visualize data flow, spotting any corrupted firmware symptoms.
- If necessary, open the unit on an anti-static mat and check the chips.
This process may sound overly methodical, but rushing repairs often creates bigger failures. Trusted, reliable results come from systematic steps backed by the right tools.
Case Study: Saving a Broadcast
During a local radio broadcast, an entire mixing console went silent mid-interview. The station panicked—dead air is a nightmare. A technician arrived with his diagnostic toolkit. Within minutes, he used test tones and an oscilloscope to trace the failure to one faulty fader. A quick replacement and soldering job brought the station back live.
Without those tools, the station might have stayed down for hours, costing sponsors and credibility. It’s a reminder: sometimes the gear you don’t see is the most important.
Building a Trusted Toolkit Step by Step
Not every beginner can afford everything at once. That’s fine. Start with:
- A solid soldering station
- A reliable multimeter
- Basic precision screwdrivers
Then, as you gain experience and income, add advanced tools like oscilloscopes or frequency analyzers. Think of your kit as an evolving companion in your career.
How Tool Choices Connect to Bigger Maintenance Culture
Talking about tools is only one slice of the bigger pie. Articles like practical guides to preventing audio system failures and the value of consistent equipment care show that tools aren’t just for emergency repairs—they’re for routine upkeep that extends gear lifespan.
There’s also the decision point of whether to repair or replace, which has been explored in pieces like deciding on audio repairs instead of replacements. A well-stocked toolbox doesn’t just fix; it helps you make smarter financial decisions.
Beyond must-have tools for audio technicians, the field offers so many untold stories. For instance, a series could explore real-world repair case files, where technicians recount their biggest wins and worst mistakes. This kind of content humanizes the work, showing the messy side of the job.
Another idea: eco-friendly repair strategies that highlight reusing spare parts, safe disposal of old components, and sustainable upgrades. This taps into the growing interest in green electronics.
Or imagine a guide on seasonal maintenance—like protecting speakers from humidity in summer or preventing cracked solder joints in winter. It’s detailed, practical, and shows technicians care about long-term reliability, not just quick fixes.
These future articles wouldn’t just list tools or steps—they’d paint vivid pictures of problems, solutions, and lessons worth sharing.
FAQs
Q1: Do I really need an oscilloscope as a beginner?
Not immediately. Start with essentials like a multimeter and soldering kit. Oscilloscopes are powerful but better once you’re handling advanced repairs.
Q2: What’s the difference between cheap and professional soldering stations?
Professional ones have stable temperature control, anti-static safety, and faster heating. Cheap irons can work but risk damaging sensitive circuits.
Q3: How do I protect delicate gear while repairing it?
Always use an anti-static mat, handle components with care, and store them in protective cases after servicing.
In the end, having must-have tools for audio technicians isn’t about showing off—it’s about being prepared. From a soldering station and multimeter to advanced diagnostic tools, each item builds trust in your work and ensures reliable repairs.
If you found this guide useful, please share it with fellow audio lovers, DJs, or technicians using the buttons below. Sometimes, the right tool in the right hands is all it takes to save a show, a reputation, or even a career.